Showing posts with label recipes. Show all posts

Sunday, January 27, 2013

First of all, if you haven't signed up for your chance to win Jill Savage's newest book "No More Perfect Moms" please visit here to enter for your chance to win!

And now onto the most important part of this post....a delicious recipe for a cold winter night!

Whole Wheat Buttermilk Biscuits


Ingredients:
  • 2 cups flour (I used  1 and 3/4 c. white whole wheat flour, and 1/4 c. all purpose)
  • 2 1/2 tsp baking powder
  • 1/2 tsp salt
  • 5 Tbsp chilled butter
  • 3/4 c. fat free buttermilk (or use milk with a splash of lemon juice in it)
  • 3 Tbsp honey
Directions:
  • Preheat oven to 400F
  • Place flour, baking powder, and salt in large bowl.  Cut in butter with pastry blender until mixture resembles coarse meal.  Chill for 10 minutes.
  • Combine milk and honey- stirring with a whisk until well blended.  Add to flour mixture and stir until just moist.  DO NOT OVER STIR.
  • Turn dough onto lightly floured surface and knead lightly 4 times.  DO NOT OVER KNEAD.
  • Sprinkle small amount of flour on top of dough and roll out to about 3/4 inch thickness and use a biscuit cutter to cut our  your biscuits.
  • Place on cookie sheet sprayed with non stick cooking spray.  You can use a light egg wash on top to give them a golden color.  I always cheat and use milk brushed on top or this time I used the pan spray with a light spritz on top.
  • Bake for 12 minutes or until golden.  Remove from pan and cool on wire rack 2 minutes and then serve.
*The secret to delicious fluffy biscuits is to not over stir or over knead!

And now as I sit here and stare at the recipe I realize that I put too much butter in mine.  Too much butter is never a bad thing right? : )  Too bad I thought I was eating a biscuit a bit healthier for me at the time!  With the appropriate butter levels though, these biscuits come out to right around 130 calories a piece, and they were delicious with more butter, but I am confident even a little less butter would make them delightful and better for your waistline ;)   

Bon Appetit!


Tuesday, January 15, 2013

Banana Chocolate Chip Protein Pancakes

I absolutely love finding recipes of some of my favorite foods and turning them healthy, or at the very least semi healthy food.  So what better food to do that with than good ole pancakes!  I love pancakes but I hate the sugar high and sluggish demeanor that follows when I eat them.  So I set out to find a better alternative to one of my favorite things and I came across this amazing blog and ultimately found my new protein pancake recipe!  I did modify the recipe a bit so I will list those below as well.

Banana Chocolate Chip Protein Pancakes

Ingredients:
  • 1 cup old fashioned oats
  • 1 small banana, mashed
  • 1/2 cup cottage cheese  (you can use yogurt in its place)
  • 2 egg whites (or 1 whole egg)
  • 1/2 teaspoon cinnamon
Directions:
  1. Place oats in blender or food processor and blend them until they are a gritty flour type mixture.
  2. Add the rest of the ingredients and blend well.
  3. If mixture is too thick add a bit of milk or water so that it is a medium to runny gruel mixture.
  4. Heat griddle on stovetop and use nonstick spray or butter on griddle.  
  5. Spoon pancake mixture onto griddle into medium size pancakes.
  6. Throw a few chocolate chips onto your pancakes (5 per pancake is plenty!)
  7. Flip when surface is starting to bubble.
A Few Side Notes:
  • I also tried using a flavored yogurt the other day cause it was all we had on hand (happened to be strawberry) and it was delicious!
  • This is a much more dense pancake but still takes care of the craving, fills you up, and there is no sugar high afterwards.  Bonus- because they are much more dense and moist than a regular pancake, you can use very little syrup and cut down your calories and sugar intake as well.  It simply doesn't need all the syrup the fluffier pancakes just continue to soak up!


My guaranteed way to know if a modified healthy recipe is a winner or not is if I get the chef's approval and he did indeed enjoy these and so did our little Sous Chef.....


Do you have a favorite dish that you've found a way to enjoy and still be healthy?  I'd love to hear what it is! 

Bon Appetit! 

Bridget

Thursday, December 20, 2012

Gingerbread Cookies

I'm pretty sure I mentioned in a previous post how obsessed Abbie is currently with the Gingerbread Man on our Christmas Tree.  Well I don't really like sweets sitting around the house too often because I don't have self  control about anything dessert related, but come on...it's Christmas, and I have a kid now.  Everyone knows how much fun making Christmas cookies with your family is.  So we opted for making these delicious Gingerbread Cut Out Cookies.  They were perfect and really not your true Gingerbread cookie.  They were more of a sugar cookie with a hint of ginger and cinnamon.  Absolutely perfect and delicious!

Gingerbread Cookies 
(Submitted by Kim (footballgrl16 on allrecipes.com)

1 (3.5oz pkg) of cook and serve butterscotch pudding mix
1/2 cup butter
1/2 cup packed brown sugar
1 egg
1 1/2 cups all purpose flour
1/2 tsp baking soda
1 1/2 tsp ginger
1 tsp cinnamon

Directions
  1. Cream together pudding mix, butter, and sugar until smooth.
  2. Stir in the egg.  Combine the flour, baking soda, ginger, and cinnamon and stir into the pudding mixture.  Cover and chill dough until firm.
  3. Preheat oven to 350 F.  Grease baking sheet and roll out dough on a lightly floured area until it is about 1/8 inch thick.  Cut into shapes using cookie cutters of your choice.  Place cookies 2 inches apart on the baking sheet.
  4. Bake for 10-12 minutes in preheated oven or until cookies are golden brown.
  5. Cool on wire racks.
  6. Once cool, frost using your favorite butter cream frosting.  I found that mine looked much prettier when I used my decorator tip for detailing on the cookies.


We may or may not have gotten in a flour fight....pretty sure I started it :) 


Rolling some dough, cutting some cookies, and eating some frosting!


Enjoying some cookies with Dad


Pretty little Gingerbread Men!

Do you have a favorite Christmas cookie recipe?  Please share your favorites and links to recipes if you have them!

Blessings,


Monday, November 19, 2012

Baked Breaded Pork Chops

About a month ago I found some pork chops on bargain sale (aka Krogers quick sale meats that are about to expire if not sold by tomorrow.  Did you know you can get meat in this area for typically 1/2 the price if not more and all you have to do is freeze it for future use?  Awesome!  I like meat but I hate the cost of it so count me in!  So I bought them and froze them to use for a meal in the future.  This week I decided to try to do something with them.  

Random side note...for those of you who don't know me from my former life I grew up on a hog farm.  So you'd think, that me, of all people would know what to do with a pork chop.  Confession....I don't have a clue.  I just ate the meat growing up.  I didn't ever have to cook it.  So after looking online for some ideas I decided to try making baked pork chops with breading and wow!  They did not fail to disappoint!  The chef was quite pleased with the results from my new found dinner idea, and I must confess I was pretty impressed that they were as delicious as they ended up being! 

Baked Breaded Pork Chops

Ingredients:
  • 1 egg
  • splash of milk
  • Bread crumbs
  • Parmeasean
  • Italian Seasoning
  • Pork chops (how ever many you want)
Instructions:
  1. Preheat oven to 325 degrees.
  2. Beat up egg with splash of milk in bowl big enough to dip pork chops into.
  3. Mix a 50:50 ratio of bread crumbs to grated parmeasean cheese, with 1 tbsp of Italian seasoning in separate bowl.  There really isn't a set amount of how much you need to mix together, but if you have a large family make sure you have enough "breading" to coat several pork chops.
  4. I like to use one of my cookie cooling racks onto of a cookie sheet to bake things like this.  It makes them crispy on both sides.  Make sure to coat your cooking sheet and cooling rack with cooking spray for easy clean up later.
  5. Once all pork chops have been dipped in the egg solution and breading, place on cookie sheet and into preheated oven for 25 minutes or until their internal temperature is at least 145 degrees F.
*For a little bit more tang you can dip the pork chops into dijon mustard instead of egg batter before placing in breading.  I've done this with chicken before and its delicious!


They turned out moist, and delicious!  And since I was out of bread crumbs I even got to learn how to make my own.  More on that in another post!  Another simple, frugal entree from my home to yours!

Bon Appetit!

Monday, November 12, 2012

Spinach Omelet


I am pretty much always looking for ways to fit more vegetables into our diets.  These omelets are delicious, quick, easy, and a side bonus-  we typically buy a bag of spinach at Aldi and use that for salads, so the rest of the bag that is about to go bad can easily get used up in these delicious omelets!


Spinach Omelets

Ingredients:
  • 4-5 eggs
  • Shredded cheddar cheese
  • Spinach (or other veggies of your choice)
  • Salt
  • Pepper
Directions
  1. Turn skillet on to medium heat on stove.
  2. Crack open 4-5 eggs in a medium size bowel and whisk together.  You can use egg whites if you want or egg beaters.  
  3. Use a small amount of butter to coat skillet when skillet is hot enough.
  4. Pour eggs into skillet. Eggs should coat about 3mm deep of entire skillet diameter.
  5. Quickly add in chopped up spinach (or veggies of your choice), sprinkle light coating of cheddar cheese over omelet.
  6. Sprinkle small amount of salt and pepper over omelet.


Your cooking omelet should look like this in the beginning stages:


Once your omelet is almost done the eggs should look more gel like, not runny, and cheese should be thoroughly melted like this:

Use a rubber spatula to help flip one side of the omelet over and roll it up like this:

Finally, if you are a nice mom, cut off 1/4 of your omelet and share it with your always hungry toddler :) 

Abbie and I probably eat these once a week for lunch on one of my days off.  They are quick, cheap, and healthy.  I'm kind of anti most processed foods so you probably won't see egg beaters in our house...sorry!  Besides if I only use 4 eggs for one omelet and give a portion of it to Abbie, I've really only eaten 3 eggs plus a lot of veggies!

Do you guys have any go to lunch ideas that you love to use on a regular basis?

Blessings,


Wednesday, October 31, 2012

Stuffed Acorn Squash

Time for another fall recipe!  I love squash!  I know it might not be many peoples favorite food but I encourage you to try it.  If you need to break yourself in then try baking the squash in the oven and putting brown sugar and butter on it.  Not really healthy but at least it will get you used to the texture and tastiness that squash can be!  Squash is a great source of fiber and potassium for your diet. 

 I tend to not actually cook exactly how a recipe says to (unless its baking...you can make huge mistakes in baking if you don't follow exact measurements!) so for this particular recipe I threw in extra celery, and you could even add in some of your own extras that might go well with the rest of the ingredients...nuts, mushrooms, etc.  One other added bonus.....it's an in season fall produce product and you know what that means?  They are cheap right now!!  Hope you enjoy!!

Stuffed Acorn Squash


Ingredients:

  • 2 acorn squash
  • 1 tsp olive oil
  • 1 medium apple (peeled, cored, diced)
  • 1/2 small onion (finely chopped)
  • 1/2 celery stalk diced
  • 1/2 tsp dried thyme
  • 1/2 tsp oregano
  • 1/2 tsp dried sage
  • 2 cups cooked brown rice
  • 1/2 cup dried apricots
  • 1/4 cup raisins or dried cranberries
  • 1/4 cup apple cider (or juice)
Directions:
  1. Pierce acorn squash all over with a knife or fork and microwave on high for 2 minutes.  Remove from microwave oven and let rest for 1 minute.  Cut squash in half from top to bottom (crosswise).  Scoop out seeds and membranes.
  2. Place squash halves two at a time, cut side down in a microwaveable baking dish.  Add 1/4 cup of water then cover with plastic wrap.  Microwave on high for 5 minutes.  Repeat with other two halves. Cool and set aside.
  3. Preheat oven to 350 degrees
  4. In medium skilled saute onions until translucent.  Add in apples, onion, and celery and saute for 2-3 minutes.  Sprinkle mixture with thyme, oregano, and sage.  Stir in cooked rice, dried fruit (I only had raisins and cranberries so I just added more of these).  Add apple cider and cook until almost evaporated.
  5. Place cooled squash on large nonstick cookie sheet.  Spoon stuffing into squash cavities.  Bake for 20 minutes.  
**The stuffing mixture should freeze fairly well so make extra and freeze for batches in the future for a quick fall meal***


Bon appetit and Happy Halloween!!
Does your family have any favorite fall meals or fall traditions??  Please share!

Monday, October 22, 2012

Sweet Potato Fries

Sweet Potato Fries


It's no secret that one of my favorite seasons is fall, and fall never disappoints when it comes to food either.  One of my favorite fall foods is sweet potatoes!  So good and good for you.  In fact they are much better for you than regular potatoes.  Why?  Mostly due to their lower levels of sugar than regular potatoes.  They are much lower on the glycemic index (higher levels mean your blood sugar spikes much higher when you eat something) than regular potatoes and in addition great sources of fiber and Vitamin C.  I try to use them in our house as much as I can in place of regular potatoes and besides all that, in the fall you can buy them super cheap!  Now buying sweet potatoes and loading them up with butter and brown sugar isn't really gonna help you much in the health department so here is my Sweet Potato Fry Recipe:

  1. Cut sweet potatoes into wedges or long fries.
  2. Toss with a little bit of olive oil.
  3. Place onto cookie sheet and spread into single layer
  4. Sprinkle sweet potatoes with cinnamon (light dusting all over).
  5. Sprinkle tiny amounts of cayenne pepper if you want a little bit of kick (a dab will do ya!)
  6. Finish with a light dusting of kosher salt and place in oven at 375 degrees.
  7. Bake for about 35-40 minutes (until tender) and serve.

Bon appetit!


Wednesday, July 18, 2012

Delicious dinner recipe, Abbie's first sentence, and Abbie's 15 month picture!!

Dave had to work tonight but Abbie and I enjoyed some one on one time in the kitchen.  She loves to help and it melts my heart to see her so excited about getting to do what I'm doing.

Our menu tonight:
Baked Trout with a lemon butter glaze topped with mango salsa, cilantro lime brown rice, and a spinach salad drizzled in raspberry vinaigrette with dried cranberries and apple slices.

Trout fillet (or other white fish)
 Glaze: 

  1.  Melt 1/2 tbsp butter (depending on how many fillets you are cooking.  I was baking 4 small trout fillets and I don't like to add more calories if I don't have to).  
  2. Add 1Tbsp lemon juice to the melted butter.
  3. Drizzle or brush this over the uncooked fillets.
  4. Sprinkle salt, pepper, thyme, parsley, and garlic powder (or minced garlic) onto the fillets.
  5. Bake at around 400F for 15 minutes or until firm to touch.
Mango Salsa
  1. Cut up one mango.  See this tutorial for how to cut up a mango here
  2. Cut up one jalapeno.  See this tutorial for how to safely cut up a jalapeno here
  3. Cut up one bunch of cilantro, minus the stems.
  4. Mix all of the above together in a bowl (save a little cilantro for your rice though!) and add a splash of fresh lime juice.
Cilantro Lime Brown Rice
  1. In my kitchen I always have rice made up ahead of time.  I cook a big batch and freeze it in bulk.  So for this particular dish you would either cook your rice and then add the seasonings, or in my case I would thaw my frozen rice and then recook and season it.  
  2. Place cooked rice in heated sautee pan with just a little olive oil or butter.  
  3. Add a splash of lime juice, salt, and pepper.
  4. Stir in the remaining cilantro.
  5. Once heated thoroughly serve.
Spinach Salad with dried cranberries and apples
  1. Mix spinach greens thoroughly with vinaigrette after washing and drying (just enough to lightly coat leaves)
  2. Sprinkle on dried cranberries and add apple slices.
  3. Walnuts or almonds would be good with this salad as well, I was all out tonight but I have used them in the past and it tastes delicious!
Abbie was cracking me up when I was cutting up the mango.  She kept stealing all the mango and I finally said "If you keep eating all the mango we aren't going to have enough to make the salsa for our fish."  
She didn't seem to care and proceeded to try and crawl up onto the counter : )

Oh and other random side note just so its documented...Abbie said her first sentence.  That might be over exaggerated a bit but I think its fair game....she has been signing different words for awhile now.  "More" and "please" being two words she uses on a regular basis.  She can say both of the words but sometimes prefers to sign them over saying them.  Well tonight I could tell she was trying with all of her might to communicate rapid fire to me that she wanted more apples and she looked at me and signed but also said it "Mow peez"....she got it!  She is starting to understand that you can put words together to make sentences and though she has no idea what a sentence means she is starting to understand that please doesn't just mean you automatically get food and that saying more doesn't meant you automatically get food, but that mom and dad insist that you ask for such things nicely. I was dumbstruck.  It won't be long before she gets that you should say "More apples please."  She is making more and more connections with how things work on a daily basis and it just amazes me the way their little minds work and makes me realize how much I take for granted that I forgot I had to learn on my own once upon a time as well.  

And one more thing before I forget, I finally sucked it up and took her somewhere to get her pictures taken.  Up until she was about 11 months old I took them myself with my DSLR and they turned out great.  Problem now is....that I am mom.  Mom is the photographer and when mom is the one trying to take pictures of the subject that just wants mom to hold her...well you get a bunch of pictures of a toddler walking towards the camera rapid fire with arms  held out looking like Frankenstein.  So I gave in and had them taken at Portrait Innovations.  They did a really nice job and I was proud of myself for not giving into their spiel and only purchasing my favorite pose to get the price special.  I paid less than $11 for 1- 11x13, 2- 8x10, 4- 5x7, 4- 3x5, and 24 wallets.  That is a lot of pictures for $11 and it actually wasn't as hard to pick my favorite pose as I thought it would be.  So I am going to share the picture with you.  I am really strongly against pirating, stealing anyone's work be it photography, movies, music, etc so no, I will not be printing this off cause I scanned it in, I just wanted to be able to share it with all of you so you could see it too (besides did you not just read that they gave me a buttload of pictures for only $11...I don't need anymore anyway :)


I think it turned out well!  It's a perfect 15 month photo of her and is already being proudly displayed in our house.

I am leaving for the Proverbs 31 She Speaks conference Friday morning at 6:40AM (well that is what time my plane is supposed to leave anyway!), so this is most likely my last post until sometime next week (hopefully!)  Please be praying for me and the other woman there.  I have been able to chat with many of them over facebook, and have already gotten to know my roomie a bit through email.  I am so excited to meet them all.  I can already tell they are such a loving group of woman who just want to build up each other as the body of Christ in order to glorify Him more.
Prayer requests for me specifically:  that I would be patient with God's timing and will in this conference and let Him orchestrate His plan for me, not me for Him (I always mess it up when I try to do it instead of letting Him!), for confidence and boldness in being myself around a group of 650 strangers, and most importantly that I would be able to press into Him and seek out His will for me in this.  To trust Him regardless of what He asks of me to do.

Have a fantastic weekend!!!
God Bless!!

Bridget


Wednesday, June 27, 2012

Zucchini Bread


Abbie and I had a fun afternoon today making a healthy alternative to an American favorite...Zucchini bread!  It's off of one of my favorite blogs:  100 Days of Real Food.  If you haven't checked out her blog you should head over there.  I love her stuff and will probably share several of her recipes in the future.  We are trying to eat more whole, less processed foods around here and these.  They aren't completely sugar free but close :)  I did modify her recipe a bit and added those into the recipe you'll see listed below.  Are they your typical bakery fresh oozing with butter, sugary goodness muffin?  Of course not!  But my taste tester husband the chef approved!  

Here is the finished product:

Zucchini Bread
  • 3 cups whole-wheat flour (I used King Arthur’s white whole-wheat flour)
  • 1 tablespoon cinnamon
  • 1 ½ teaspoons baking soda
  • ¼ teaspoon baking powder
  • 1 teaspoon salt
  • 3 eggs
  • ¾ cup oil (I used olive oil and actually used a 50:50 ratio of applesauce to oil
  • ¾ cup honey (used a 50:50 ratio of honey to sugar...I'm cheap and didn't want to use all my honey :)
  • 1 teaspoon vanilla
  • 3 cups grated zucchini
  • 1 cup chopped nuts (optional)

DIRECTIONS:

  1. Preheat oven to 300 degrees F for small loaf pans or 325 degrees F for large loaf pan or muffins.
  2. Blend the dry ingredients.
  3. Make a well (or hole) in the center and pour in the eggs, oil, honey and vanilla. Stir just until mixed – do not overmix.
  4. Fold in the grated zucchini and chopped nuts if using. Pour batter into greased loaf pan(s) or muffin holders and bake until a toothpick comes clean in the top/center of the loaf or muffin.
  • If using smaller pans bake for 30 – 40 minutes. I was able to fill four of my small loaf pans.
  • For one larger loaf pan bake for 50 – 60 minutes.
  • For muffins bake for 15 – 20 minutes.
Enjoy and don’t forget to freeze the leftovers!

Here's a picture of Abbie enjoying one of her new goodies.  I wish I had captured a picture of the process.  She had flour everywhere!  We had a lot of fun though so picture or not....I have the memories!

Wednesday, January 25, 2012

Oh no....another food challenge!

So a few days I saw a post over at Keeper of the Home....go ahead. Go take a look and then come back and see my thoughts...

Dang....feeding a family of 4 on $250 a month!!?? Granted this doesn't include household/toiletry items which my budget does, but honestly 4 people....we only have 2 well 2 1/2....Abbie doesn't eat a ton but she does eat. As I looked at her list and realized we don't eat a ton of organic food in this house, nor do we really care to, but we do eat mostly unprocessed stuff (oats, brown rice, black beans, etc), it dawned on me that she did this while buying really expensive things like organic whole milk....$8.50 a gallon? Are you serious? Soo.....since I am really competitive and I don't like to lose (aka sore loser :) I think I might start to work on challenging myself to do this. It seems doable. Scary but doable. Especially since we don't buy expensive organics. We currently allow ourselves $150 every 2 weeks.....even that has been tight lately with the rising costs of groceries. But seriously....she did it for 4 people. I am getting better about being less wasteful but I could do a better job than I do. Also I think doing this will help hold me accountable to the amount of waste I have and also the amount of non necessities I actually end up purchasing!

There is a lot of media attention/marketing investment out there in the whole "organic" thing. I'm not saying some of it isn't legitimate. Since my husband is currently about to graduate with his degree in Food Science he has actually spent a fair amount of time studying some of these concepts. The actual regulations and rules applied to being able to claim something is organic vs hormone free, etc is really interesting, and marketing does play a huge part. From what I understand only a certain % of a product has to be organic to meet the requirement to label something "organic." This is why we choose not to purchase a lot of organic stuff. I'm not saying we don't ever. I do know there are a lot of different resources out there on foods that should be purchased organic etc. I am definitely interested in learning more about them and if you have any resources from reputable sources (like academic journals etc) please send them my way. I'd love to consider implementing some new staples into our household if they are indeed healthier and truly of higher nutritional value.

Anyway back to my challenge....I know I can be less wasteful and stretch things more. So I am going to see what I can do. I don't know that I can improve it much knowing that my budget includes toiletries and hers did not but I can sure as heck try! Let me know if you'd like to join my challenge. I'd love to see what everyone else does with their decreased budget!

Monday, January 16, 2012

Part 3: Frugal Chicken Series- Chicken and Black Bean Quesadillas


And last but not least the final part of my 3 Part Frugal Chicken Series!!!
My last recipe is Chicken and Black bean Quesadilla's!!!
I had about 1 1/4 cups of chicken leftover from my crock pot chicken so these were a quick, easy, and healthy choice to use the rest of my chicken up with!

Ingredients:
Cooked chicken
1 can black beans (or cooked dried black beans)
salsa
cheddar cheese
Tortilla shells

The amounts of each really aren't important. It really depends on personal preference for how much of each ingredient you would like.

First, I put the black beans and cooked chicken in a saute pan and placed on medium heat to warm them up.


Next, I sprinkled taco seasoning on the chicken and black beans while they were heating up (just do this to taste, no need to add water, I typically just sprinkle a light coating on them.
Next, if you buy block cheese shred some up so its easy to throw in once you start assembling your quesadilla.

Then heat up a flat griddle on medium heat or you can use a larger bottom saute pan if you don't own a griddle. Once heated (you know if its hot enough by taking a little water and sprinkling it onto the hot pan- if you hear a slight sizzle its ready, if it sizzles and crackles loudly and smokes slightly then your pan is too hot. Once your pan is the correct temperature, then add a little olive oil and spread it around the pan.
Toss your tortilla on and start adding on your chicken/black bean mixture, cheese, and salsa ingredients in the amounts you desire (aka....toddler mouths might not be able to handle much salsa if any at all, or you might have a person in your household who loves spicy salsa so use that on theirs instead). You can also throw in other ingredients here as well: corn, avocado, etc. Also keep in mind that the cheese is the glue that helps this all stick together. If you want a healthier option than use less cheese, but be aware that it maybe a bit messier.

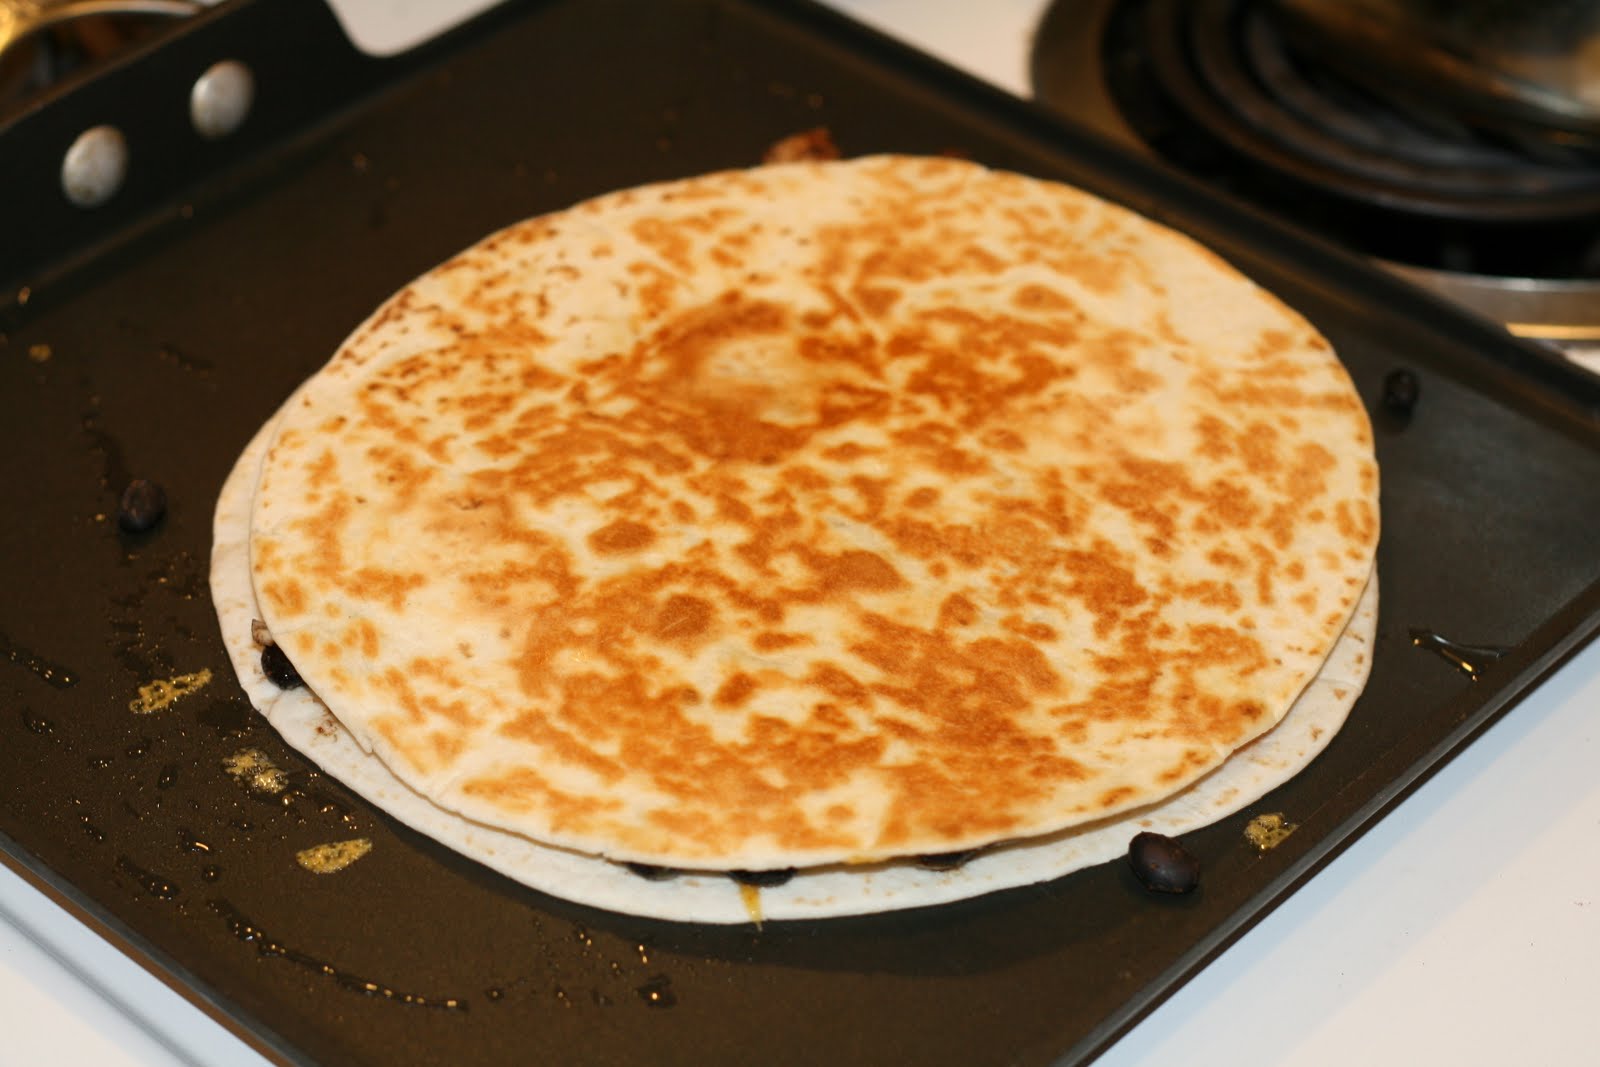
Place a second tortilla on top of your already filled bottom tortilla shell.

Flip the tortilla over when the bottom is golden brown.
Once both sides are golden brown I transfer my quesadilla to a cutting board and cut it into 8 pieces.
Serve with guacamole, sour cream, salsa, or just by itself. I had to share a picture of Abbie's plate that her grandma got her for Christmas....my hubby is a chef, so she had to get this when she saw that it said "Sous Chef."
Here is a picture of Abbie enjoying her quesadilla. She is currently, like any baby/toddler on a carb kick....so she is enjoying the tortilla in this particular picture, but I know this will be a quick, easy, healthy staple in our household for years to come!

The best part is....I had enough extra ingredients to make more quesadillas that I already assembled and cooked and now I will just wrap them and freeze them for another night. Once we decide to eat them all I have to do is heat up a pizza stone in our oven and warm them up on there...they will be crisp and ready to eat again in no time!
So not only did I accomplish what I set out to do.... turning 1 whole chicken into 3 meals, but I actually made 4 meals out of it if you include the leftovers I was able to freeze!

I encourage you to step out of your own comfort zone and challenge yourself to do something with your own whole chicken......for about $5 you can have enough meat for 3 or 4 meals of your own (depending on the size of your family it maybe less, but I know it will be a money saver for you regardless of your family size!). If you do take on the challenge please comment or email me at the_bridge83@gmail.com and let me know what you did. I'd love to hear even more quick and healthy recipe options for what I can use my chicken for in the future!!


Friday, January 13, 2012

Part 2: Frugal Chicken Series- Chicken Pot Pie with a Biscuit Crust

Part 2 of my Frugal Chicken Series is the second meal I made with the leftover chicken from my crockpot chicken....Chicken Pot Pie with a Biscuit Crust! A healthier twist to an all time favorite comfort food. It's been pretty cold and snowy for the last day here in Illinois so this recipe is a perfect end to a blustery day!

Filling

· 1 cup onion, chopped

· 1 clove garlic, minced

· 1 cup reduced-fat chicken broth

· 1 1/2 cups diced potatoes, peeled

· 1 1/2 cups chopped carrots

· 1 cup green beans, cut in 1 inch pieces

· 1 (10 ounce) can reduced-fat cream of chicken soup (or cream

of mushroom)

· 1 1/2 tablespoons all-purpose flour

· 2 cups chopped cooked chicken breasts

· 2 tablespoons fresh parsley, chopped

· 1/4 teaspoon dried basil

· 1/4 teaspoon dried thyme

· 1/4 teaspoon black pepper


Biscuit Crust

· 1 cup all-purpose flour

· 1/2 teaspoon ground sage

· 1/4 teaspoon salt

· 2 tablespoons butter or 2 tablespoons margarine

· 1/3 cup skim milk


Directions:

1. In a large saucepan over medium heat, saute onions and garlic until tender, about 5 minutes (use oil or cooking spray).


This is a really important step. I've learned from my chef husband that
being patient with sauteing onions is seriously so important! Be patient...wait for them to be translucent and golden brown like this:


If your hubby is anything like mine....properly sauteed onions are the way to his heart :)

2. Add broth, potatoes, carrots and beans (you can actually cheat with this...I throw in whatever I have...carrots, potatoes, celery....anything that you want in that is a raw veggie)

3. Bring to a boil.

4. Reduce heat to medium-low.


5. Simmer for 12 minutes, partially covered.

6. Potatoes should be a bit undercooked.

7. Remove from heat.


8. Combine condensed soup and flour in a small bowl.

I skip this step and instead of using the creamy soups make my own thickener. For this particular recipe use 1 cup cold water to1/4 cup milk and add corn starch to thicken...about 1 1/2- 2TBSP, mix with the liquid first until dissolved and then add to mixture on stovetop. Always use COLD water for this!!

9. Add to vegetables, along with cooked chicken, parsley, basil, thyme and pepper (at this step I sometimes throw in some frozen veggies like peas, and corn just to bulk it up).


10. Stir well.

This is what the mixture will look like:


11. Pour into a casserole dish (I actually just use a 9 inch pyrex pie pan so it actually looks like a pie J)


12. Prepare biscuit crust. (You could easily just make drop biscuits to drop in it or biscuits by themselves instead...but I wanted a pie look. Also keep in mind this won't have a bottom crust, just the biscuit that covers the top....this helps keep it healthy :)


13. Combine flour, baking powder, sage and salt.


14. Cut in butter or margarine with a pastry blender until it looks like coarse crumbs.

15. Stir in milk.


16. Form the dough into a ball, adding a bit more flour if its too sticky.

17. On a floured surface, roll out dough to the size where it will fit the top of

your casserole dish. (basically like if you were making a pie crust).

18. Place dough on top of chicken mixture.


19. Prick dough with a fork several times.


20. Bake at 400 F for 25 minutes, until crust is golden brown.

21. Let stand for 5 minutes.

22. Serve.


Nutritional Information

Serving Size: 1 (304 g)


Servings Per Recipe: 4

Per Serving:

Calories 407.9, Calories from Fat 106, Total Fat 11.8 g, Saturated Fat 5.3 g, Cholesterol 74.4 mg, Sodium 294.7 mg, Total Carbohydrate 46.9 g, Dietary Fiber 4.8 g, Sugars 5.0 g, Protein 27.8 g


This recipe has become a favorite in our house. It makes great leftovers to take in lunches or something for lunch on days I am at home with Abbie to easily reheat. It's healthy, and easy....doesn't take long at all! This is Part 2 of my frugal whole chicken series. Stay tuned next week for part 3, my final recipe of the series.


And just in case you were wondering what my little helper was up to? Well she was making her own chicken pot pie in the cupboard!